https://www.youtube.com/watch?v=iDnorwtrr0Y&t=20s
Product Information:
Every town needs a bank, and the LEGO® Modular Building series is no exception! Light up the highly respected Brick Bank with Lighting Kit and watch this gorgeous financial building come to life!
We’ve included lots of great lighting features in this set, including security alarms, street lamp post, flashing signage, exterior facades, and more.
This kit contains:
- 1 x AA Battery Pack (batteries not included)
- 8 x Bit Lights (White)
- 1 x Connecting Cable – 5cm
- 5 x Connecting Cables – 15cm
- 1 x Connecting Cable – 30cm
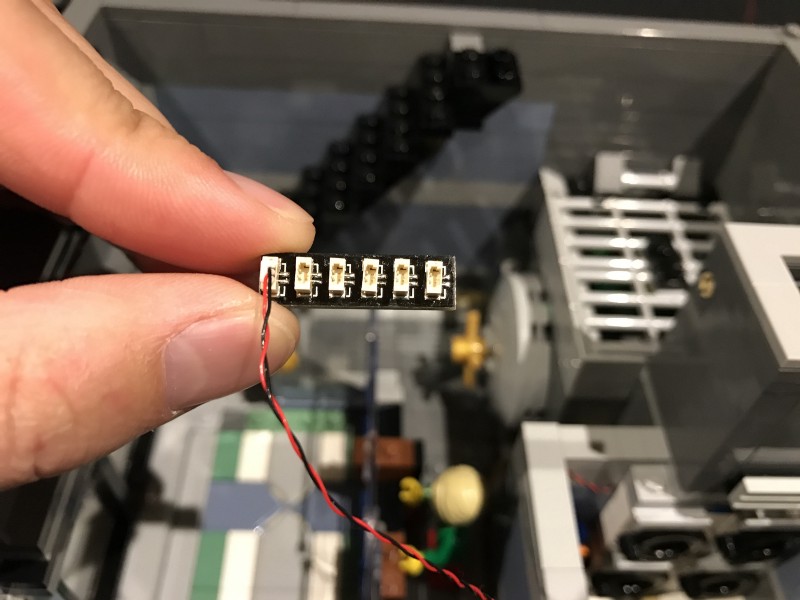
- 2 x 6-Port Expansion Boards
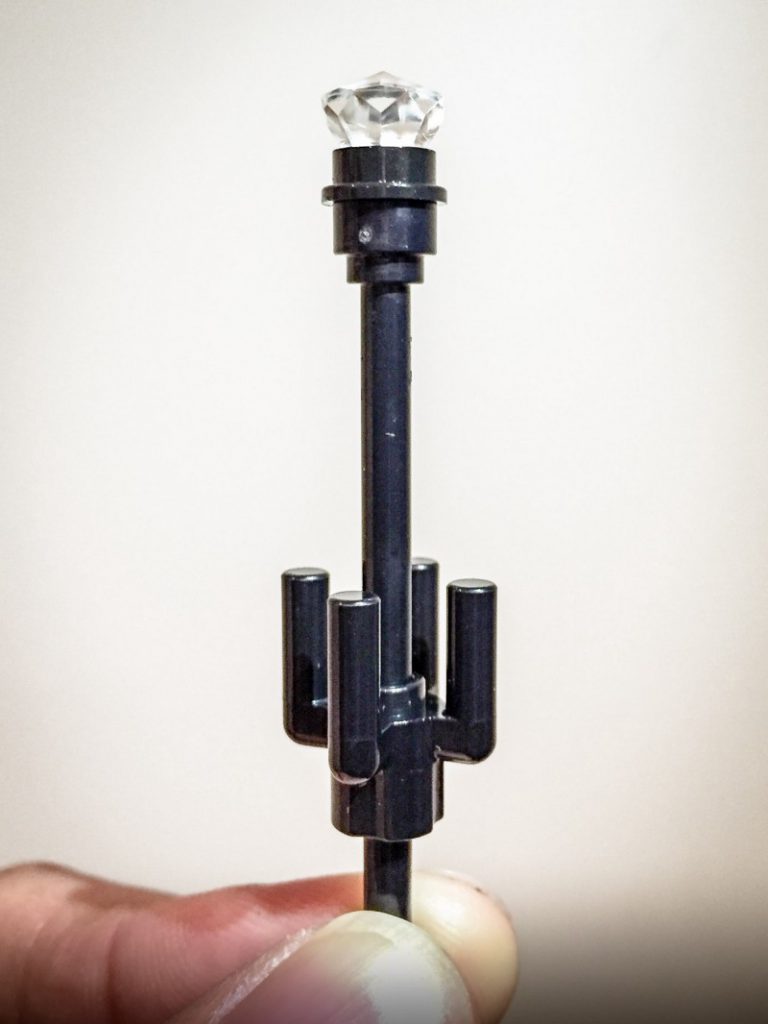
- 1 x LEGO® Lamp Post With LED Installed
- 6 x LED Strip Lights (White)
- 6 x Adhesive Squares
- 7 x Assorted LEGO® pieces for assembly
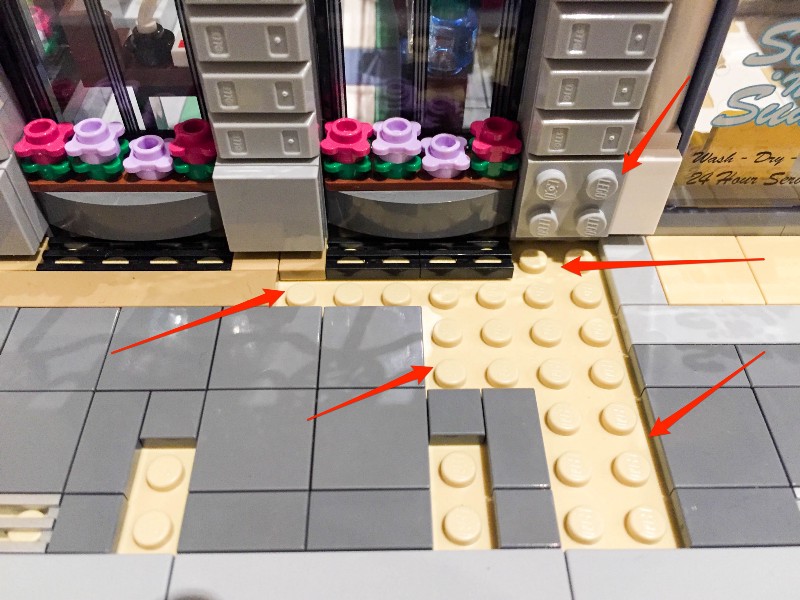
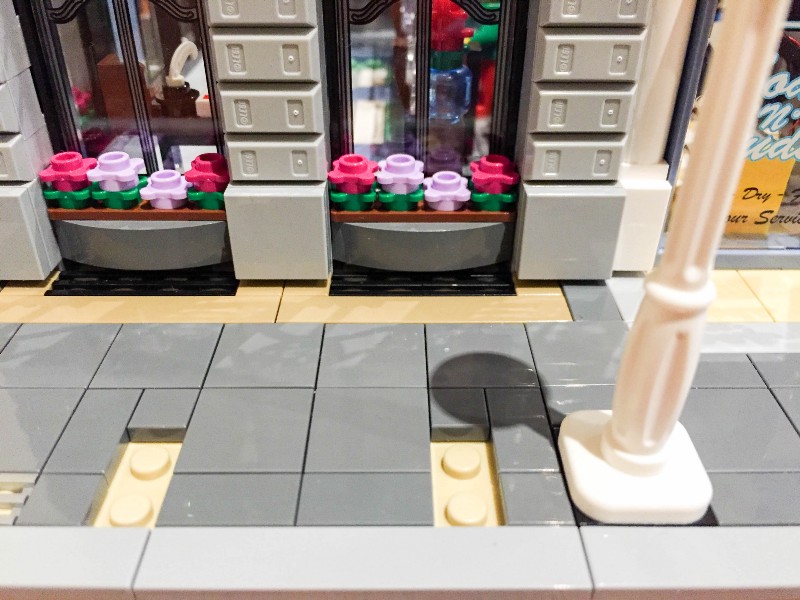
1.) This lighting kit is installed from the bottom up. Start by removing the 2nd and top levels of the modular building. To enable us to lay the cable for the lamp post underneath the brick tiles remove the following tiles as per below.
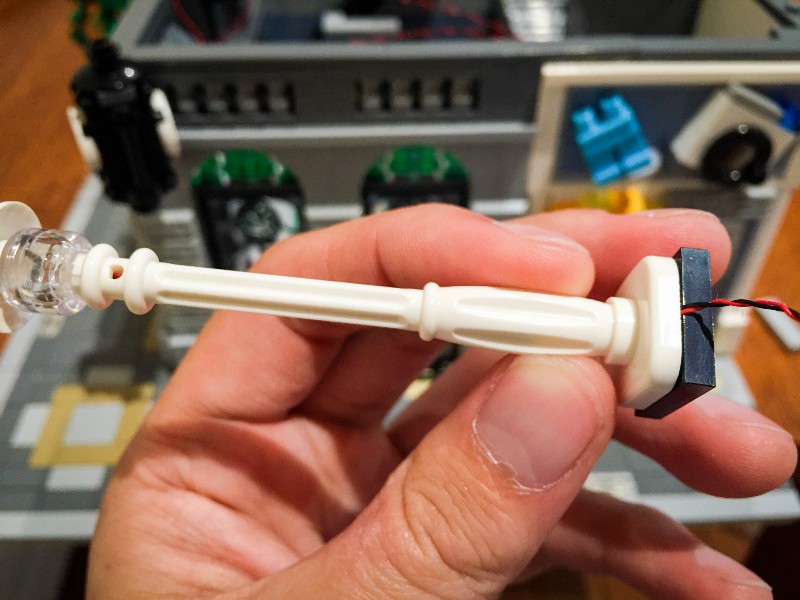
2.) Replace the stock lamp post with the lamp post ensuring that the cable is laid toward the building and that you remove the black 2×2 plate from underneath.
3.) Gently bend the base plate down and lift the building of the first floor up and thread the cable for the lamp post underneath the brick wall. Ensure that the cable is laid in between the Lego studs as pictured below.
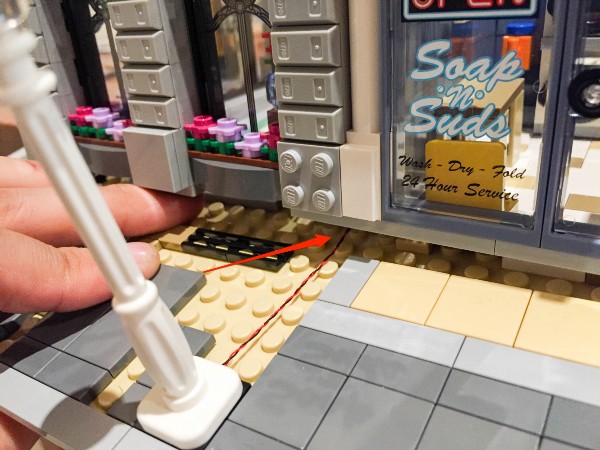
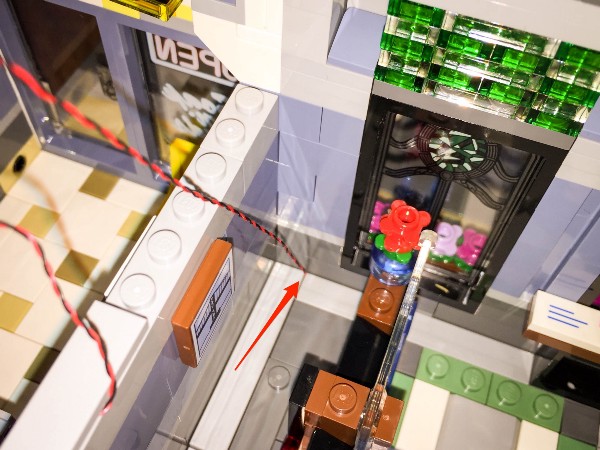
4.) Connect the lamp post cable to the 1st available port of one of the 6-port expansion boards.
5.) Replace the brick tiles we removed in step 1. They should connect comfortably over the top of the lamp post cable.
6.) Remove the bottom of the chimney and set of laundry machines and then disconnect the black 2×1 lego plate with connecting transparent red Lego plate.
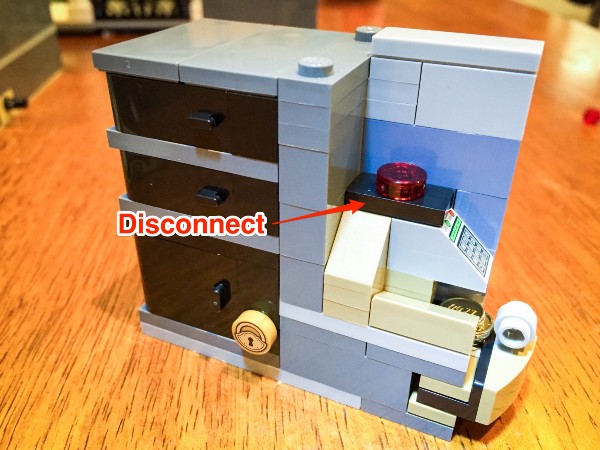
7.) Take one flashing bit light and place it underneath the provided transparent red Lego piece and connect down over the black stud ensuring the LED component is facing the correct way up.
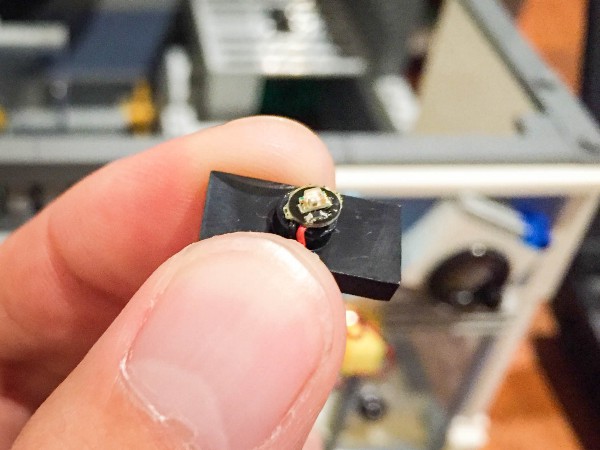
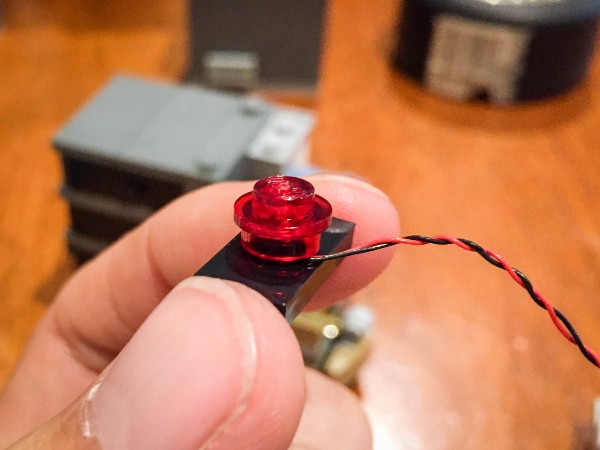
8.) Remove pictured bricks and lay the cable in between. Reconnect bricks.
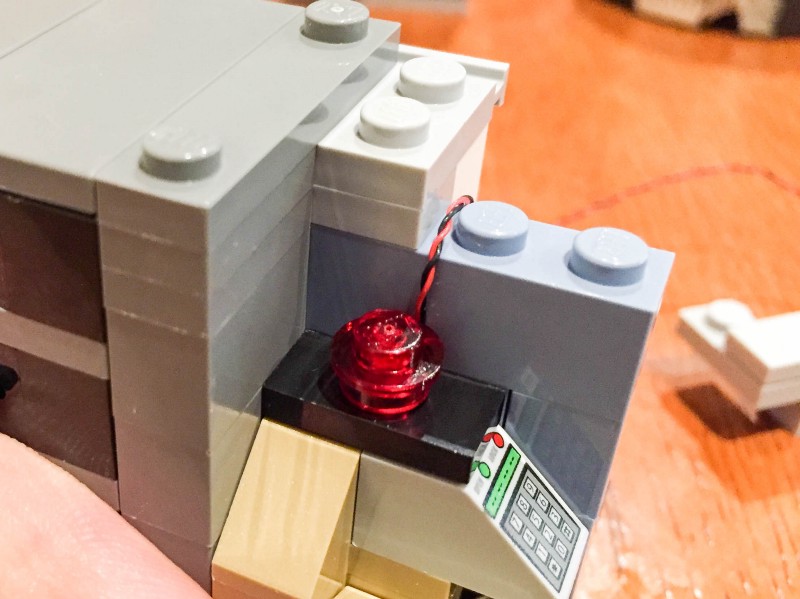
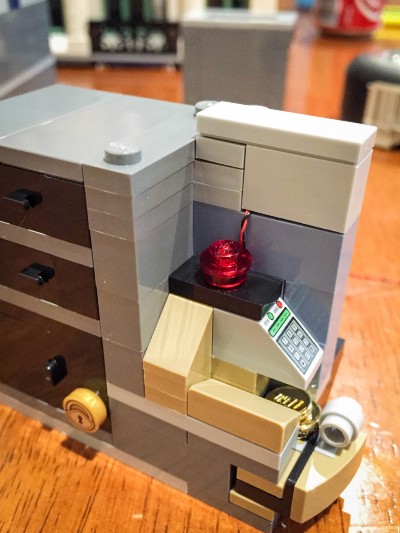
8.) Replace laundry machines and bottom part of the chimney.
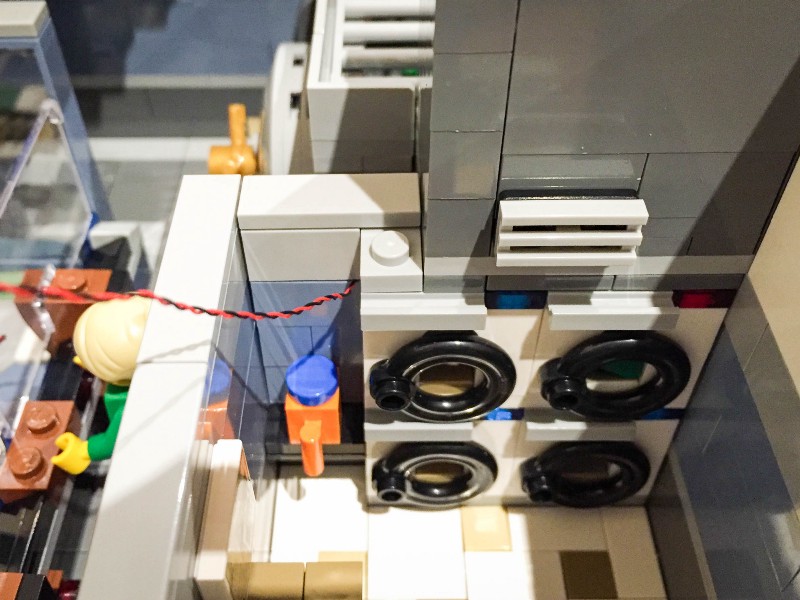
9.) Connect the cable for the flashing red bit light to the 2nd port of the 6-port expansion board
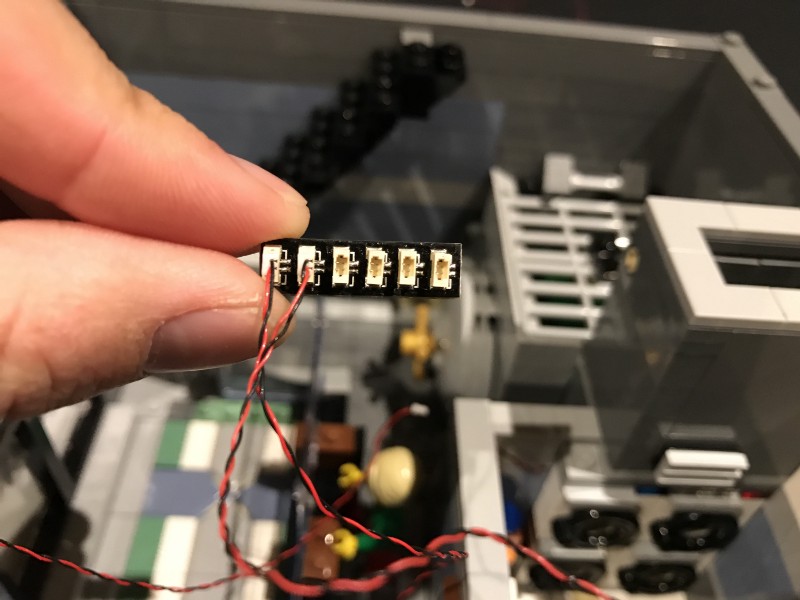
10.) Lay the excess cable underneath the flat Lego tiles as picture below
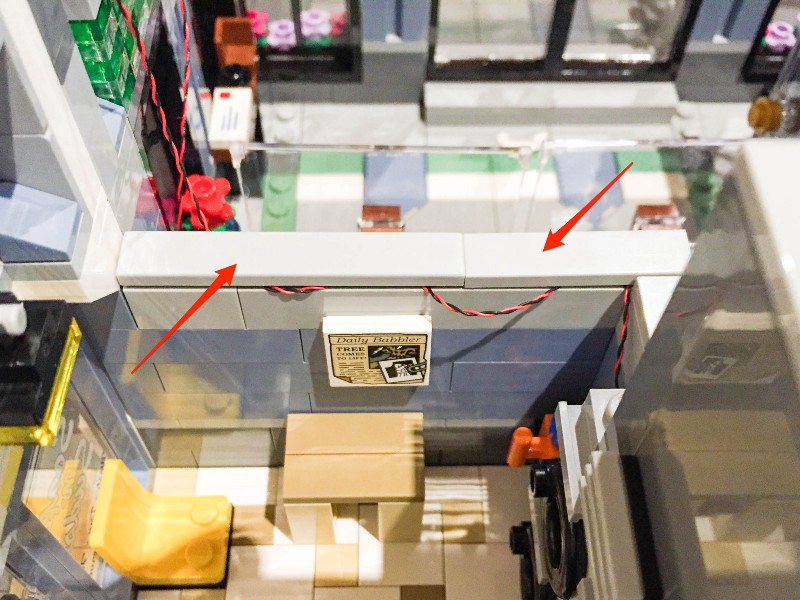
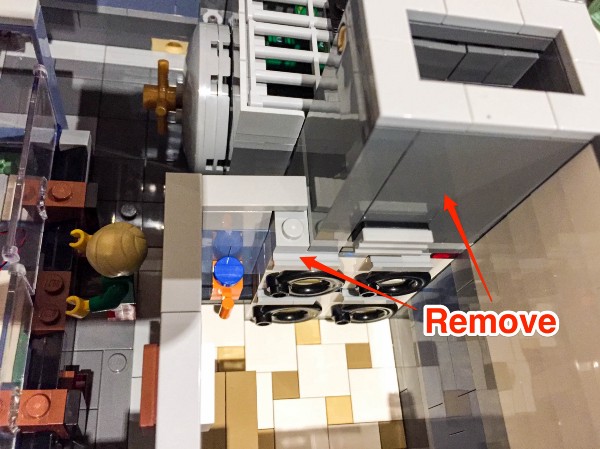
11.) We will now install a light to the laundry sign on the other side of the building. Start by removing Lego piece surrounding.
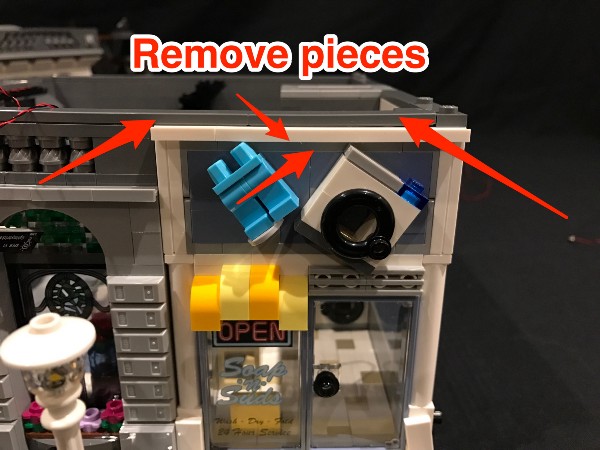
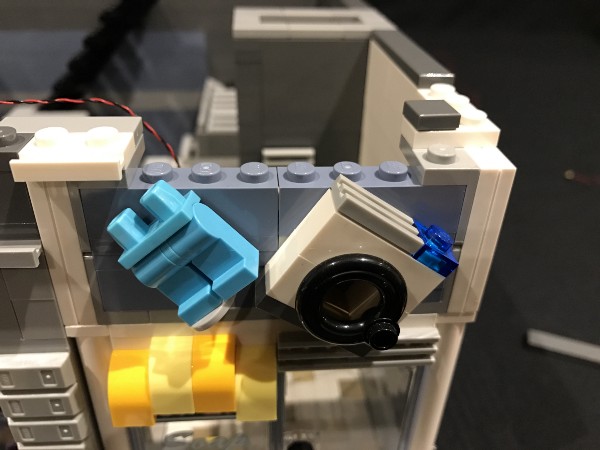
Remove the laundry machine and then install another flashing bit light underneath the transparent blue lego plate. Ensure the LED component is facing the correct way up and the cable is behind the laundry machine.
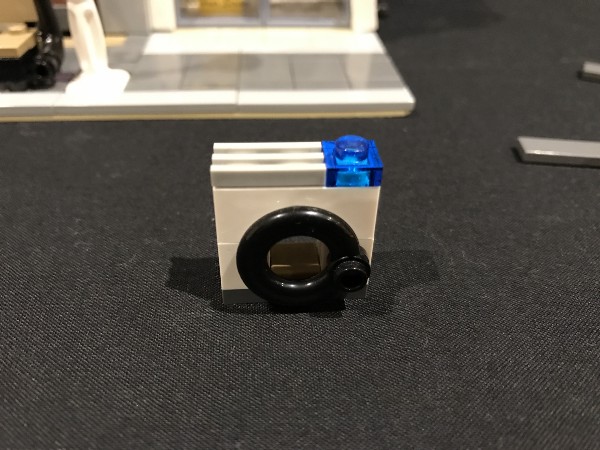
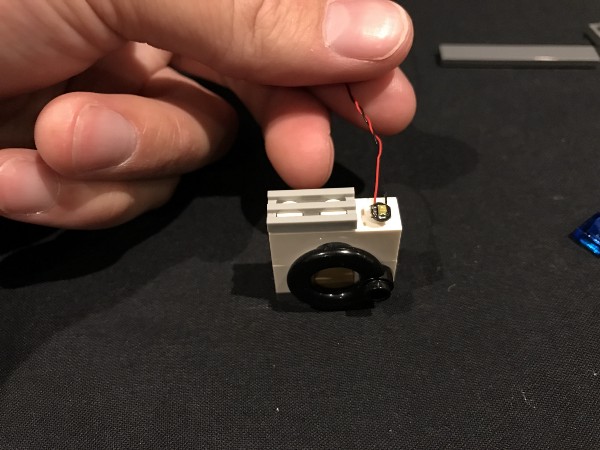
12.) Reconnect the laundry machine with bit light installed ensuring the cable is laid in between studs behind and well hidden, then reconnect the Lego pieces we removed earlier.
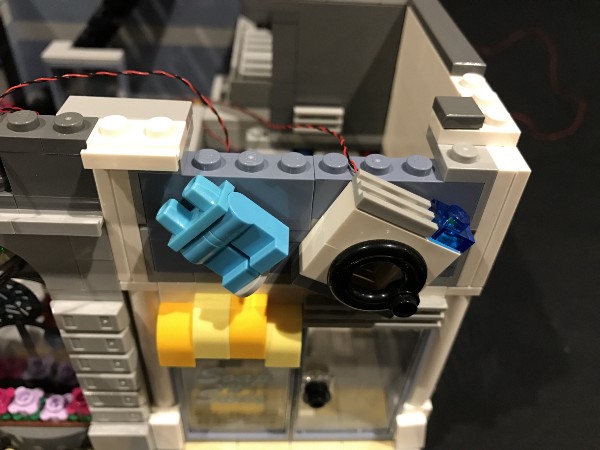
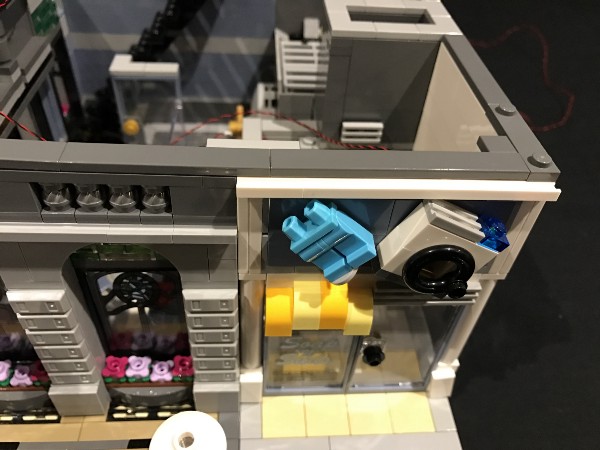
13.) Connect the cable into the next available port on the expansion board, then wind the cables around the board to eliminate excess cable.
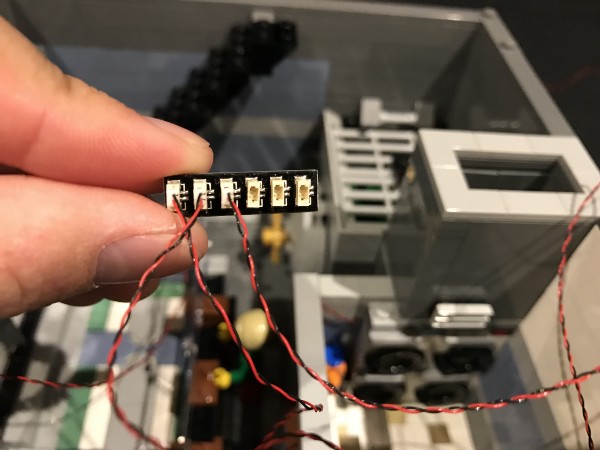
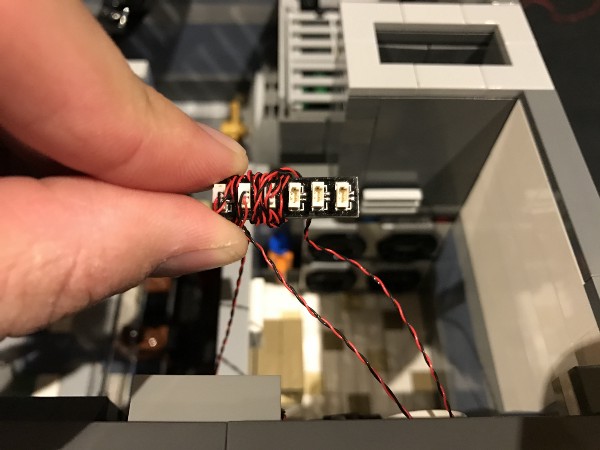
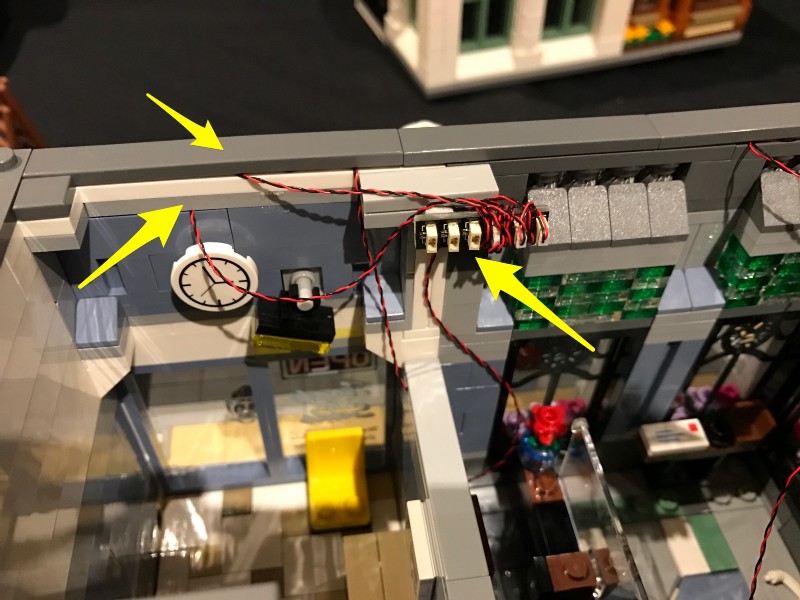
14.) Stick the 6-port expansion board to the top of the floor (on the wall) using one of the provided self adhesive squares. Then neaten up any excess cable by laying them underneath the Lego tiles in between studs.
15.) Let’s move onto the front of the building. To install the LED lights for the 2 lamps at the front of the building, remove the following bricks from the top of the first floor.
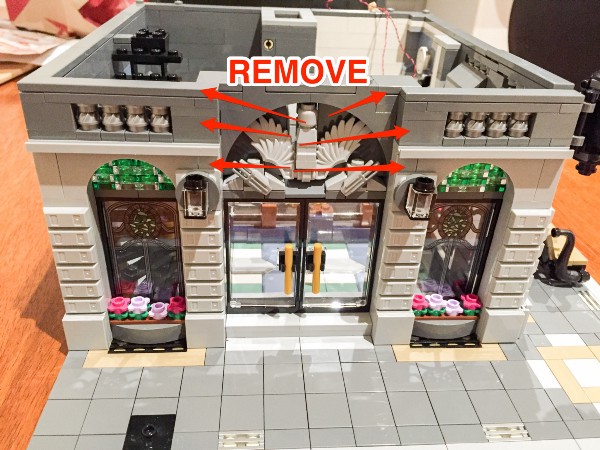
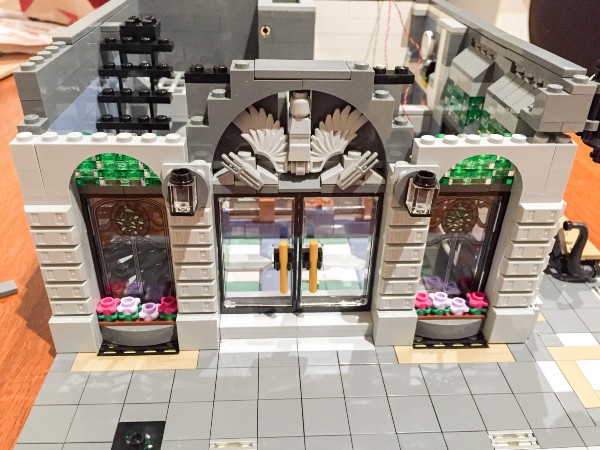
16.) Remove one of the on the Lego lights and using 1 of the bit lights, thread the bottom of cable (connecting part) through the top hole of the black round Lego brick.
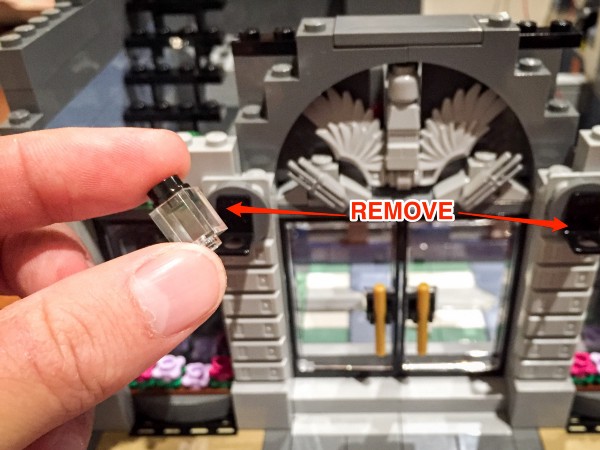
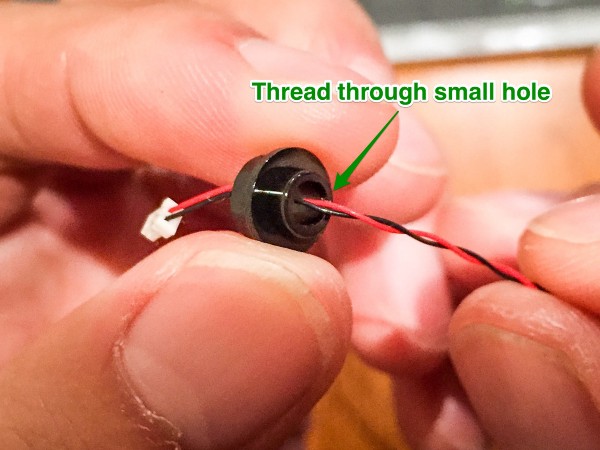
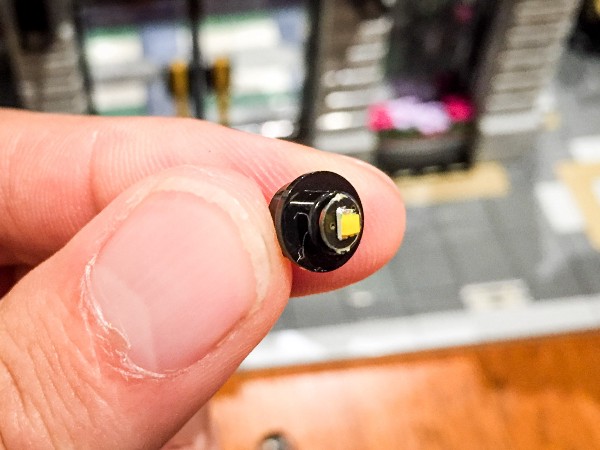
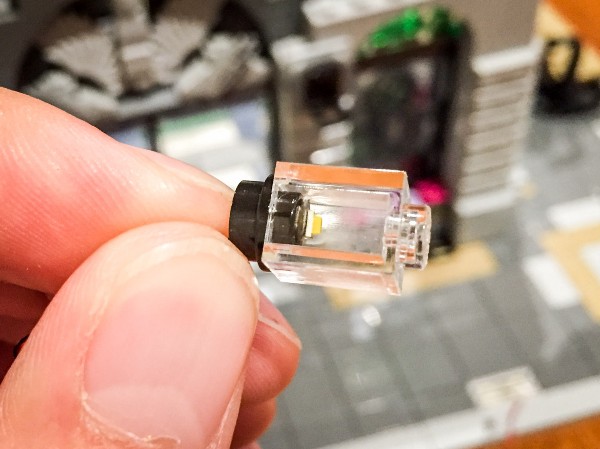
17.) Reconnect the Lego light and thread the connecting cable between bricks as shown below
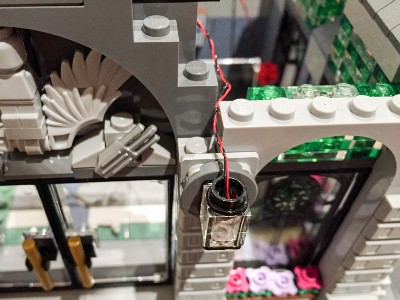
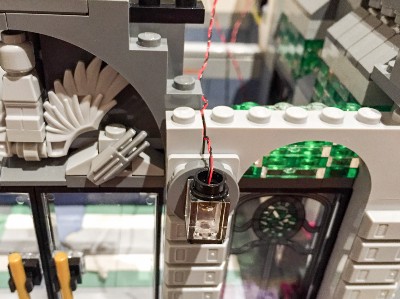
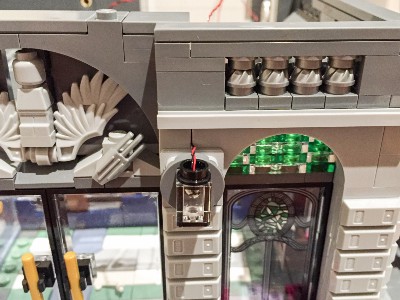
18.)Reconnect the Lego bricks we removed in step 11, and then repeat steps 12 to 14 for the other lamp at the front of the building. Leave the ends of the bit light cables spare for now as we will plug them in later.
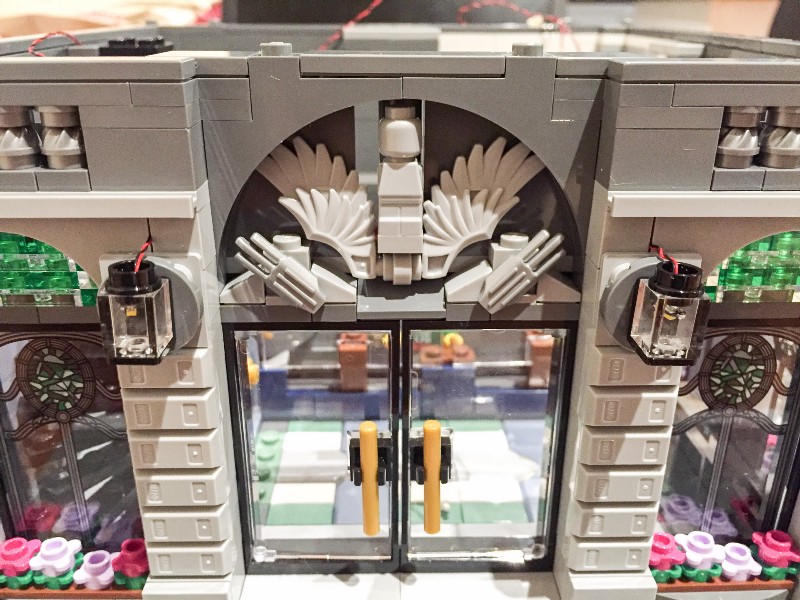
19.)Plug the connecting ends for the 2 lights into the next available ports of the 6-port expansion board we used for the street lamp and flashing lights.
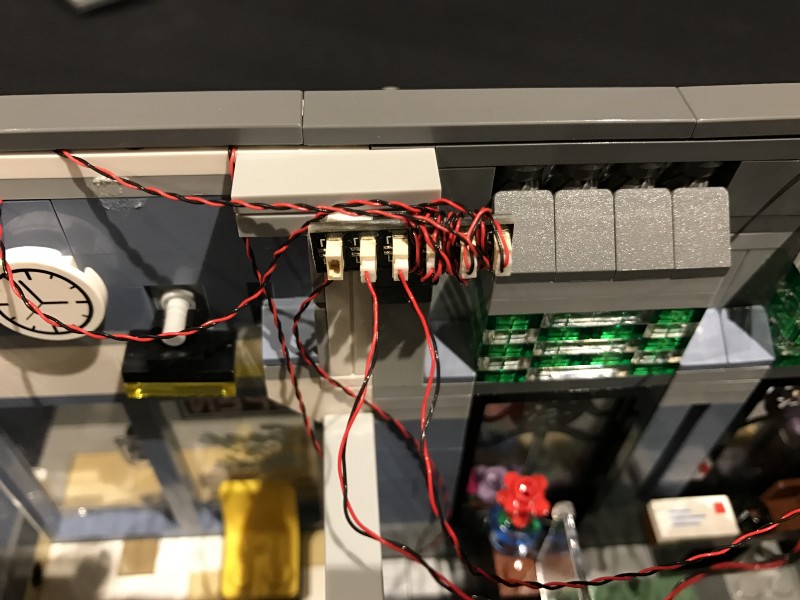
20.) Neaten up the cables from the front lights by laying them underneath the surrounding Lego tiles.
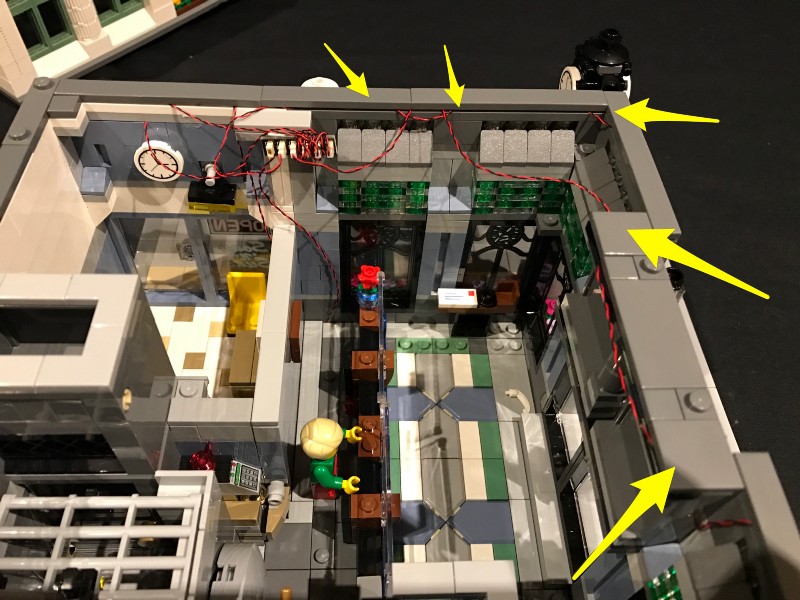
This completes the first floor. Now is a good time to test our current light circuit. Take the battery pack and insert 3x AA batteries into it. Plug the attached cable into the spare port of the expansion board and turn on to test that all is working ok
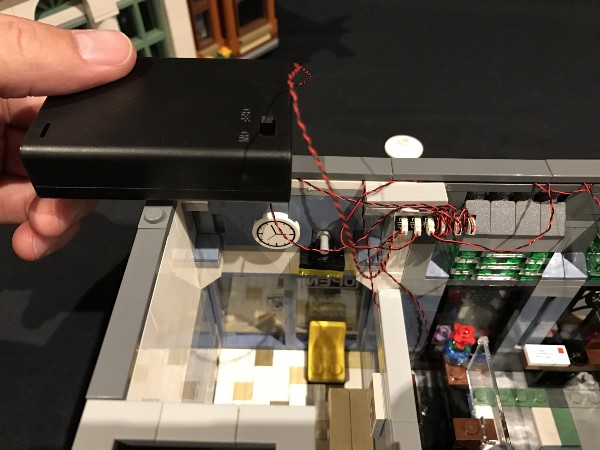
21.) Take the entire second level and then place it on its side. Take 3 Strip Lights and connect/stick them in the following positions as per below, then take a 15cm connecting cable and connect one end to the left port of striplight#1 and the other end to the right port of striplight#2. Take another 15cm cable and connect one end to the right port of striplight#1 and the other end to the left port of striplight#3.
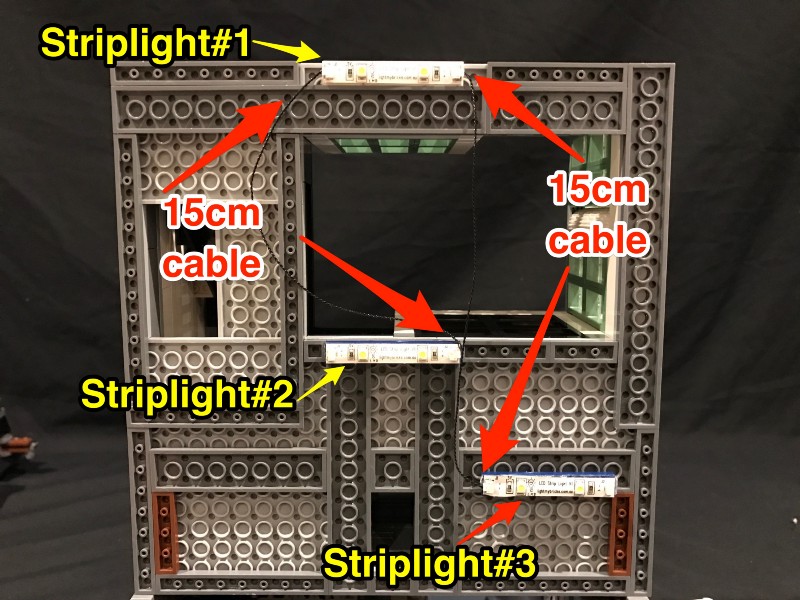
22.) Take another 15cm cable and connect it into the right port of striplight#3 and the other end into the last port of the expansion board below.
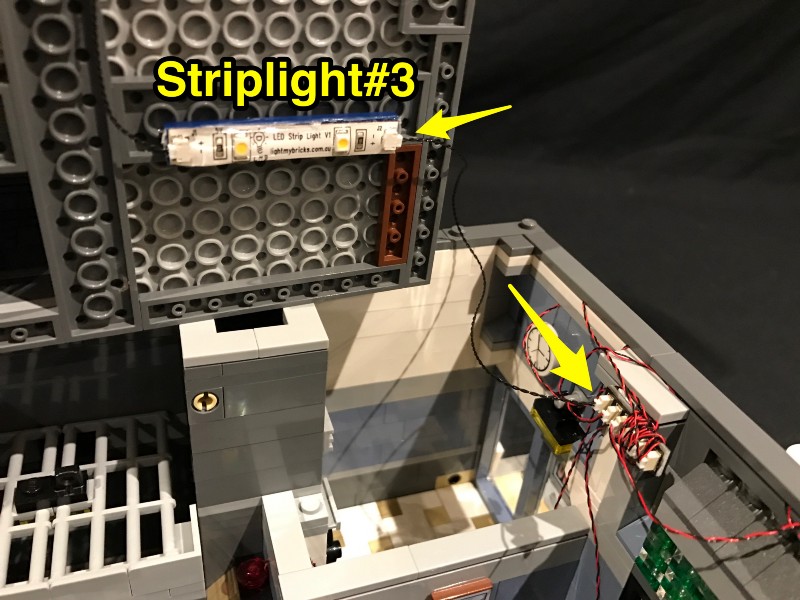
23.) Take a 30cm connecting cable and connect it into the left port of striplight#2 and then thread the other end of it up the stairway up to the second floor.
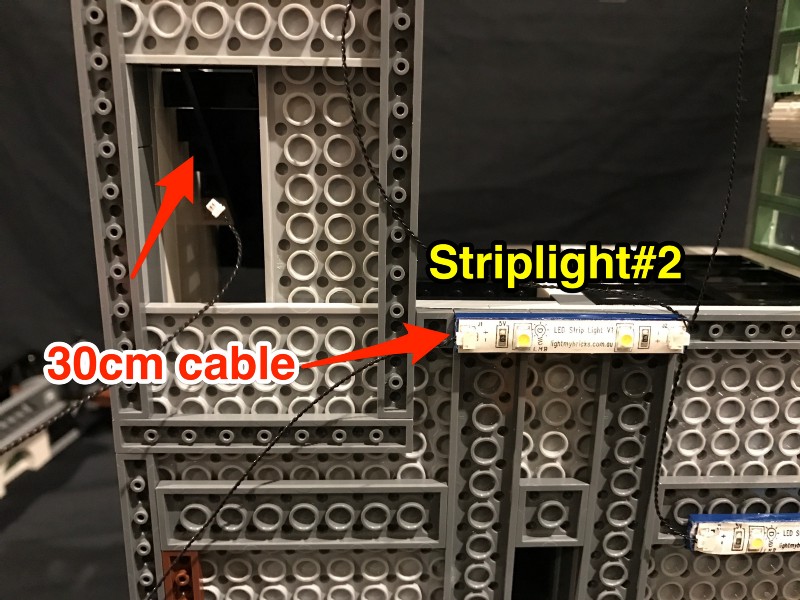
24.) Connect the second level on top of the building and then pull the 30cm cable up from the stairwell and then thread it through the space between the top stair and wall. This will prevent the cable from handing down.
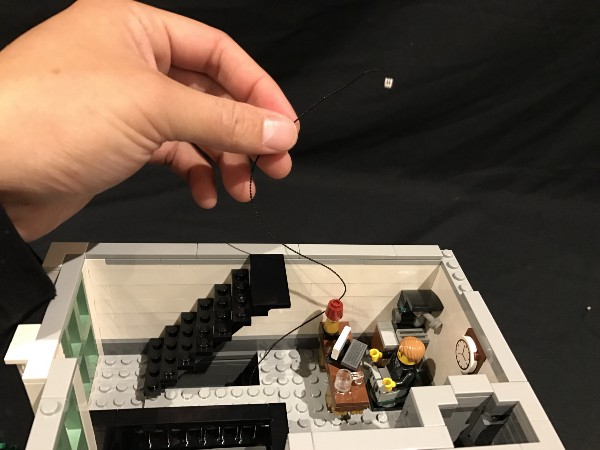
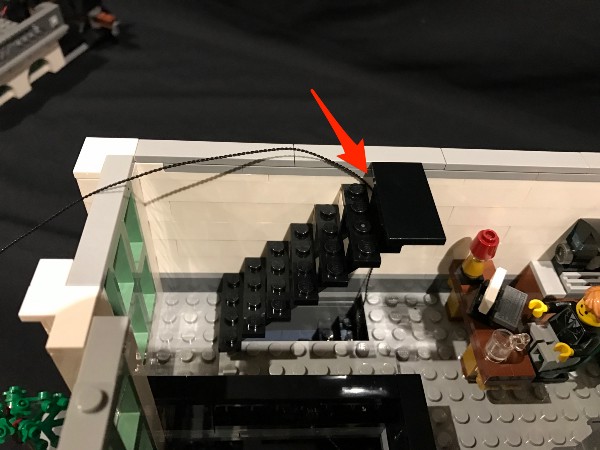
25.) Start on Level 3 by removing the following Lego bricks from the center of the roof.
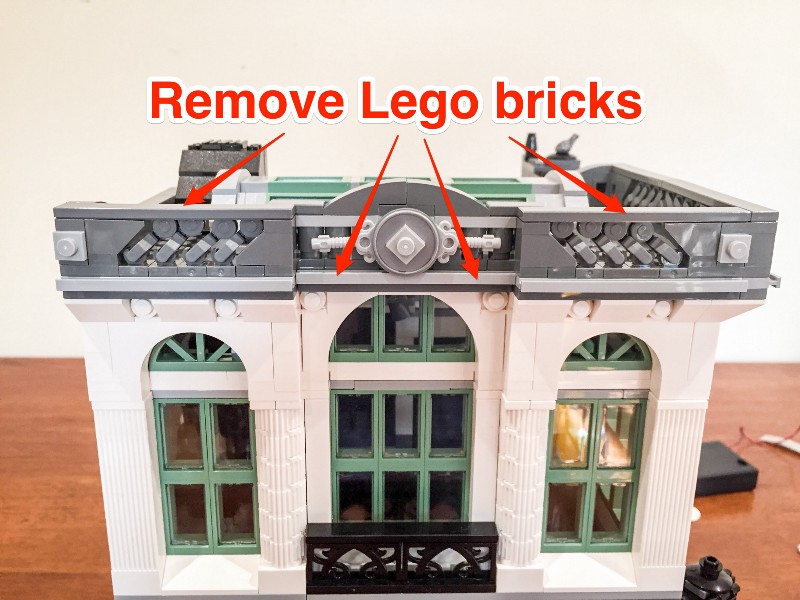
26.)Remove the centre 4×8 Lego plate and stick a strip light (striplight#4) to the following position below: This will be used for the top window light. Take two 15cm cables and connect one at each end of this strip light. You do not
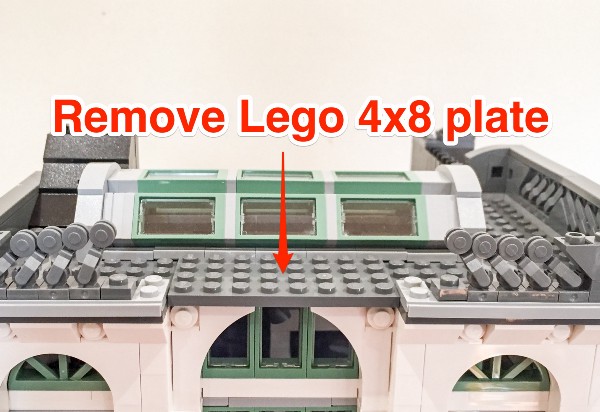
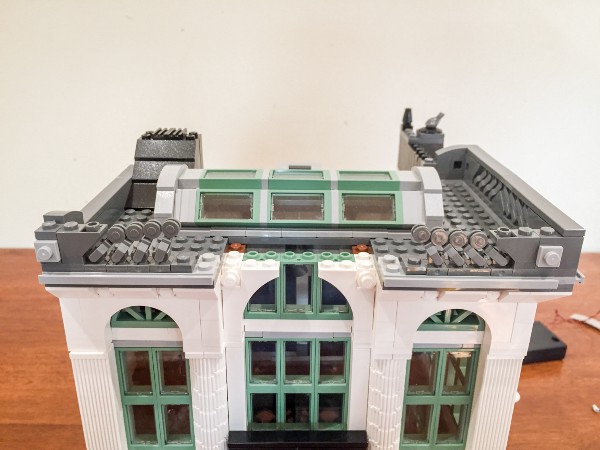
27.) Thread the other end of these 2 cables down into the spacing before reconnecting the 4×8 Lego plate back down to its original position.
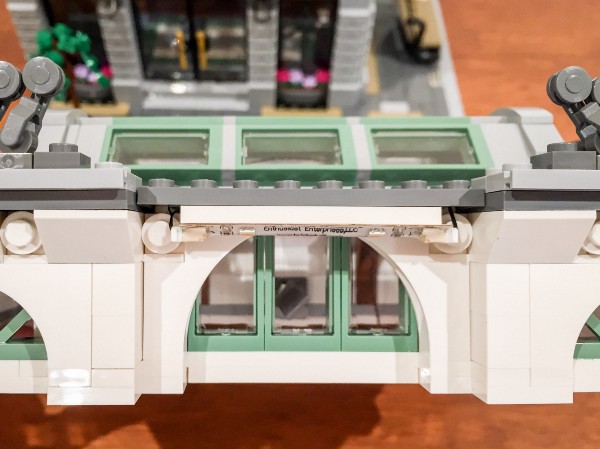
28.) Remove the chandelier from the roof and disassemble the chandelier pieces until you have first piece used to build this chandelier. Set this aside as we will install lights to this later.
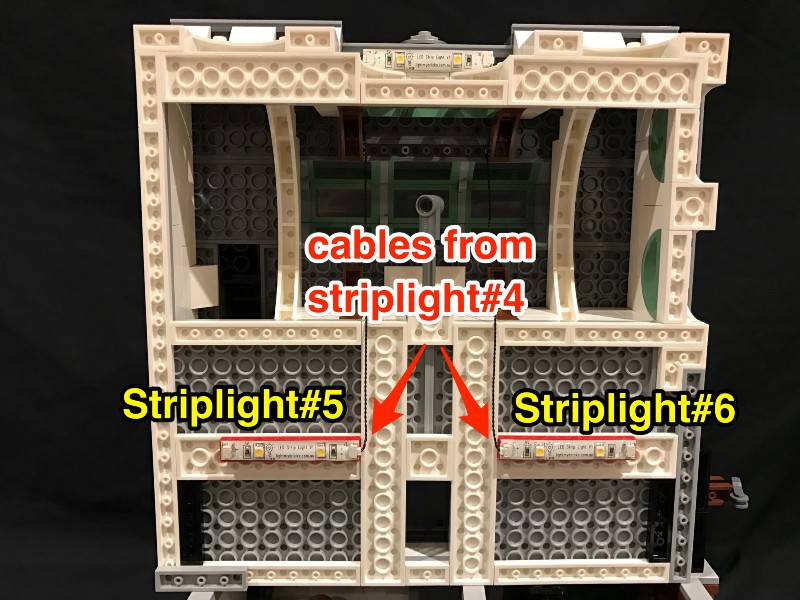
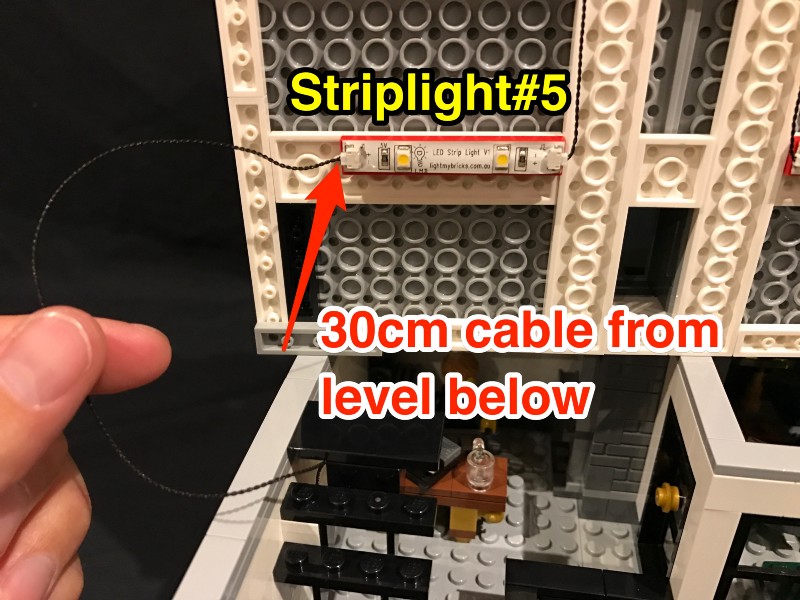
29.) With the roof section lifted up on to its side, connect/stick the 2 remaining strip lights (striplight#5 and #6) to the positions pictured below and connect the left 15cm cable from striplight#4 to the right port of striplight#5 and the right 15cm cable into the left port of striplight#6.
Locate the 30cm cable we threaded up from the lower level and then connect this into the left port of striplight#5.
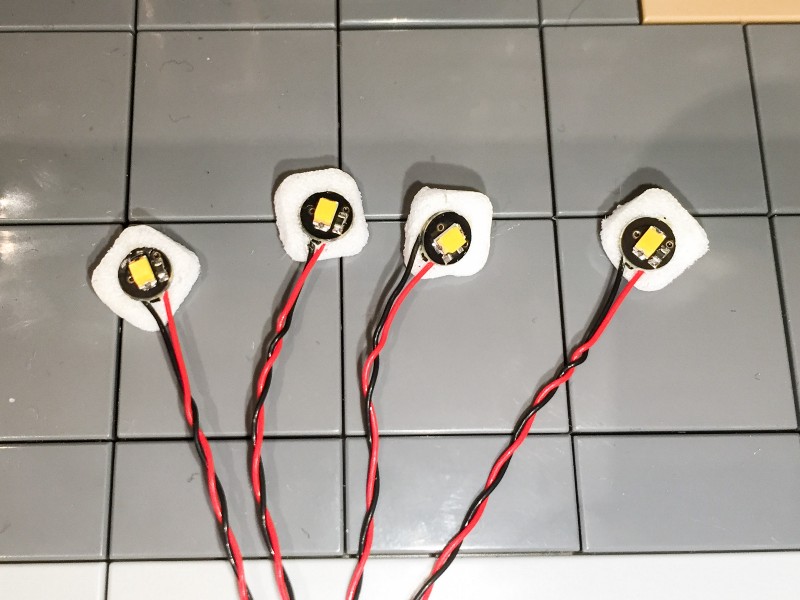
30.) Use 4 double sided adhesive squares and stick them onto the back of 4 individual bit lights.
31.) Stick the 4 bit lights to the chandelier piece in step 28 ensuring that each bit light is positioned in between where each chandelier light will be placed.
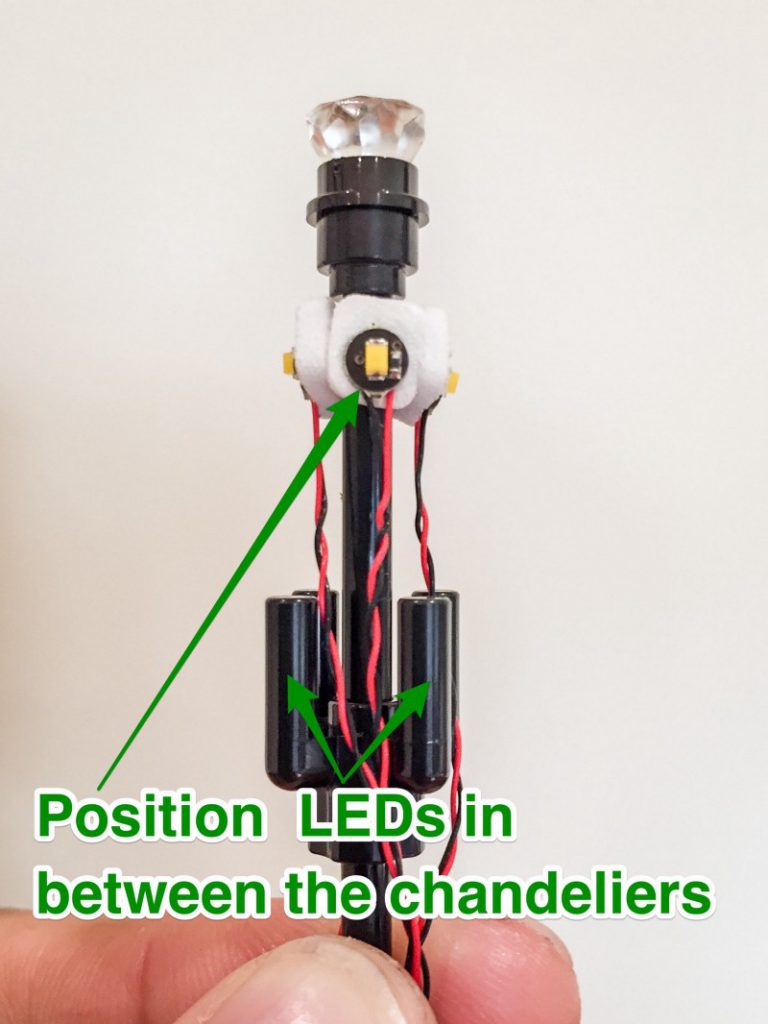
32.) Rebuild the chandelier by reconnecting each Lego piece we removed back to its original position ensuring you do not block the bit lights.
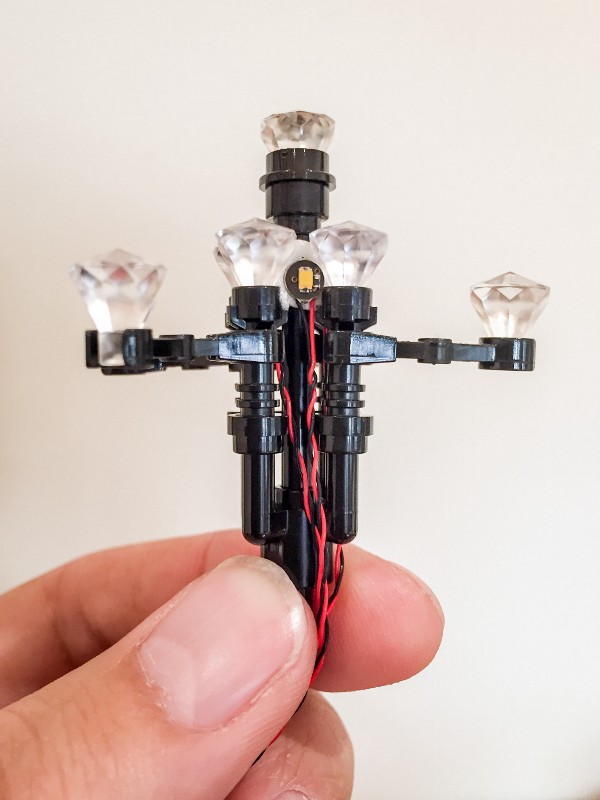
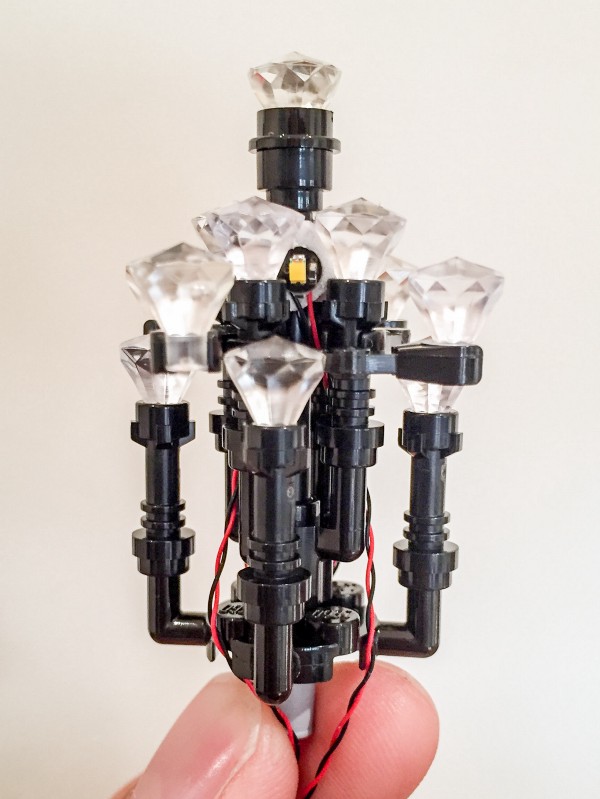
33.) Reconnect the chandelier with bit lights installed back to its original location. Group the 4 bit light cables and pull them down and then across while laying them underneath the white Lego plates as shown below.
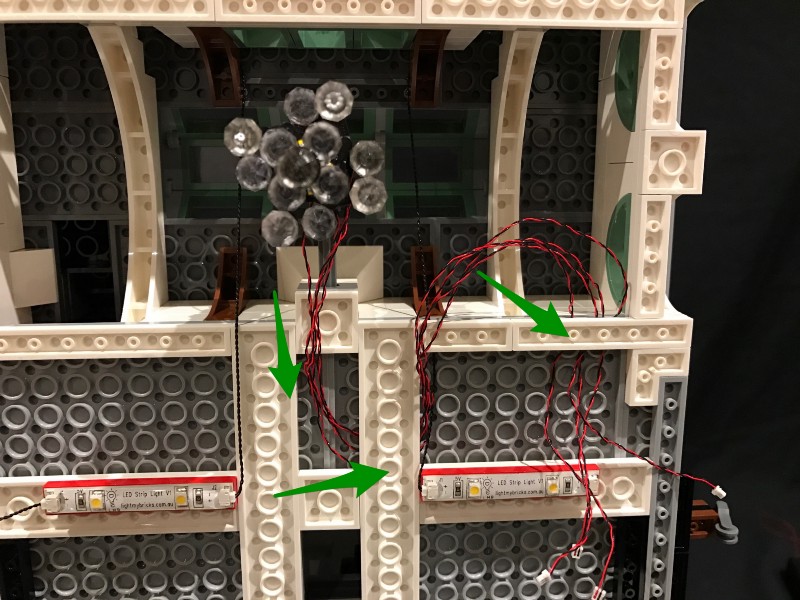
34.) Take the final 6-port expansion board and then connect a 5cm connecting cable into the first port.
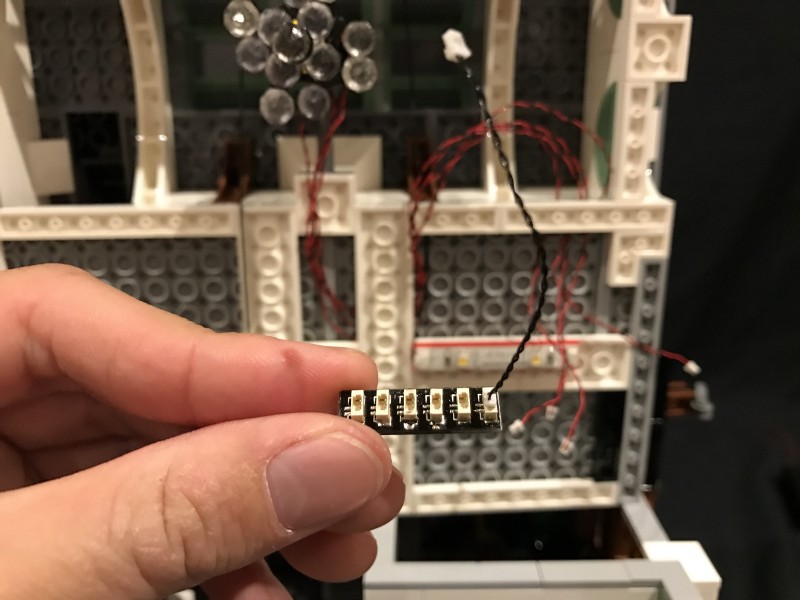
35.) Using one of the self adhesive squares, stick the expansion board onto the ceiling in the following position, then connect the 4 bit lights from the chandelier into spare ports of the expansion board. Connect the other end of the 5cm cable from the expansion board to the right port of striplight#6
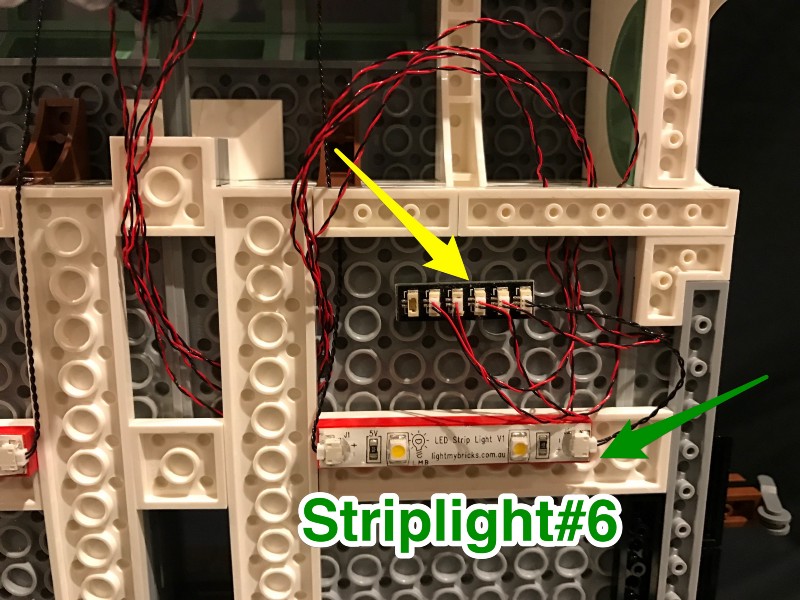
36.) Reconnect the roof section to the building then place the AA battery pack onto the roof and thread the battery cable down the chimney
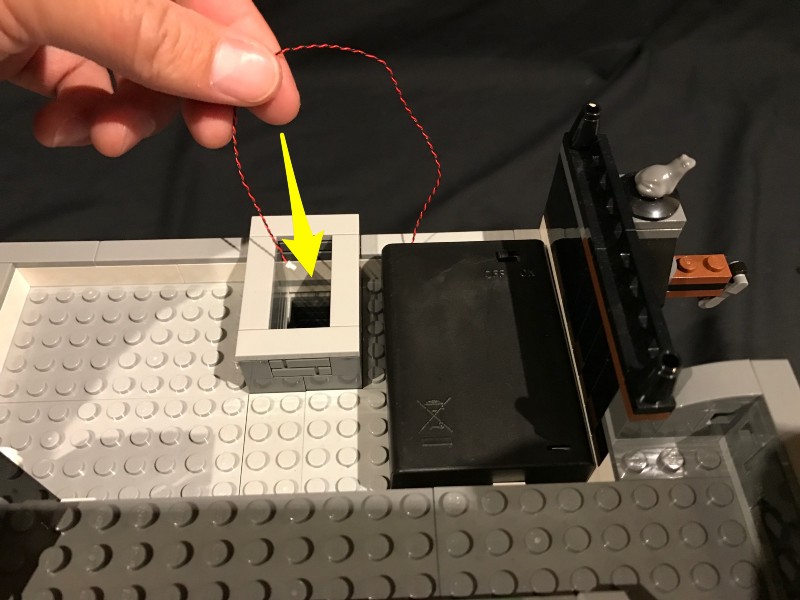
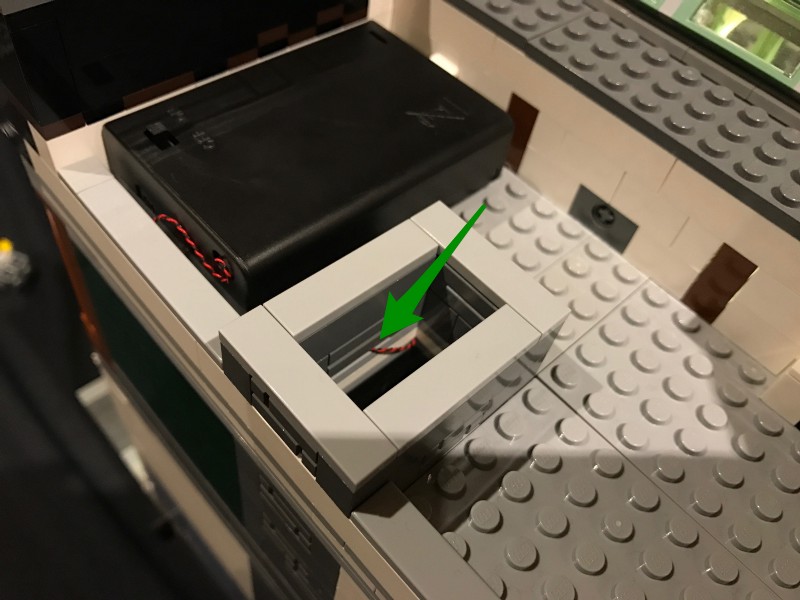
37.) Lift the roof off slightly and then pull down the battery cable from above. Connect this battery cable to the final port on the 6-port expansion board.
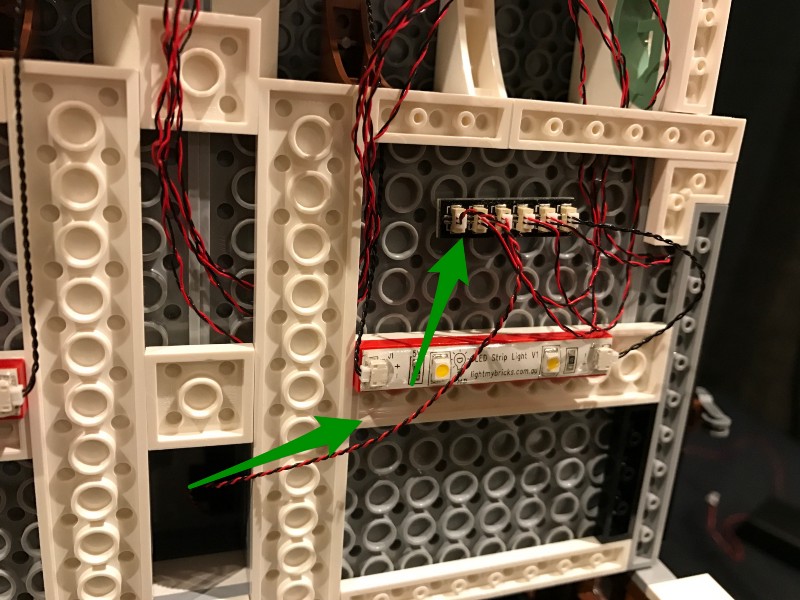
38.) You can secure the battery cable be disconnecting the surrounding Lego bricks, and then reconnecting them over the cable. Just ensure the cable is laid in between studs.
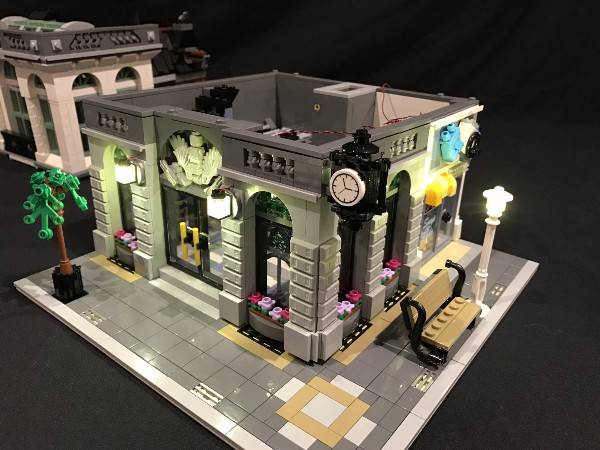
This now completes the LED lighting circuit and your Lego Brick Bank is now ready to come alive. Turn on and Enjoy!
